Tents

OK, this one is really for the complete novice more than anyone else, but the more experienced out there might find one or two points that might be new to them, or of interest in some small way.

I’m going to talk today about tents. Yes that’s right, tents. Why? when there are so many reviews on YouTube for just about avery tent available in todays market. It’s possible to do a quick search on YT and you’ll probably find the exact tent you’re considering buying. But I think that’s the problem isn’t it? They’re all reviews, which is fine if you’ve decided on a few tents that you think you like and might be suitable for you as a six foot six tall man with a dog and some extra kit that want to cook in a vestibule etc etc.

However, reviews in and of themselves do nothing to actually inform you of the nature of the different tent types out there and their suitablility for different occasions and uses.
Whats missing in my opinion is a basic run down of what makes a tent a good tent, and good depends entirely on it’s suitability to your own specific requirements.

THE BASICS:
Essentially a tent is a temporary structure made from fabric and supported with some form of pole.
In very basic terms thats it!

What makes the difference is how that structure is achieved, and the materials used.
Lets assume that the tents talked about here are manufactured to a decent level of quality suitable for its intended use.

In tems of structure there are several different types. There’s the old fashioned ridge tent, there’s dome tents, tunnel tents, semi geodesic and geodesic tents, and now trekking pole tents, all with their own strengths and weaknesses.

There are not too many pure ridge tents on the market these days so it seems a little redundant to go into too much detail, other than to say that they were the perennial favourite for many years because of the simplicity of design and relatively good stability in harsh conditions. But more about this later. Most tents of this type were made from canvas material and were therefore usually quite heavy and bulky, and as soon as new tech and materials allowed for inexpensive mass production they were quickly replaced by the rising star of the dome tent.

Dome tents usually have a pretty square footprint due to the nature of how the two poles cross diagonally from corner to corner and lift the outer to form a square dome (hence the name). These tents are reasonably stable in moderate wind, but as a general rule of thumb they’re not used in strong winds as they have a tendency to fold when pushed too far.
But as an addendum to this, there are now dome tents available that use three poles to produce a hexagonal footprint. This produces a much more stable tent than the standard two pole original.

Tunnel tents are just that, a tunnel formed by the poles effectively creating a hoop which holds the outer in its shape. Depending on the exact nature of the individual design, most one or two man tunnel tents will use two poles, but this can vary between one and three poles.

Semi geodesic tents on the other hand are considered to be vastly more stable in strong winds than a dome style tent despite still having the same basic design. These tents usually have a more rectangular footprint with the poles still crossing diagonally corner to but with an added pole at one end crossing side to side. This extra pole adds a huge amount of extra stability as it shores the basic structure.
A geodesic tent simply adds another pole at the other end further increasing the strength of the structure.

Trekking pole tents are fairly new addition to the mass market, and as the name suggests they use the trekking poles as the main support for the structure and simply guyed out at the base of the flysheet, with perhaps a couple of guy lines to give extra stability. These tents can come in several forms, from a pyramid shape created by using a single pole, to a ridge tent shape using two poles, and even an off centre ridge tent with an unusual staggered layout. These tents can be surprisingly stable in poor conditions if pitched well.

This is of course a very basic description of the main types of tent available on the mainstream market, and does not in any way take into account individual manufacturers specific design ‘tweaks’ etc. all of which can have a substantial effect on its performance.

Remember, this is a basic guide for the un-initiated, so all you tent officianados out there stay calm and please try not to have an aneurysm. I’m fully aware of how personal and sensitive this subject can be for some, and this is just my own personal take on it.

So if you’re new to the whole camping thing and you’re looking for your first tent, how do you choose which one to buy? Well that depends entirely upon it’s intended use. Campsites, or wildcamping, summer only or all seasons, high in the hills or woodland, long hikes or not far from the car. All of these things (and many others) will play a part in the decision making process, and as overwhelming as it may look, it’s really not as bad as it seems.

As long as you avoid buying a low end bottom of the range cheap as chips tent, then to be perfectly honest you’ll be fine in most circumstances that you’ll encounter in the Great British environment outside of winter.
I wouldnt recommend going out in winter if you’re just starting out as there are many other considerations to take into account other than just having a stable weatherproof tent.

There are other posts here that deal with staying warm at night and what kind of kit is available to do so.

My best advice on the subject of tents is to follow a couple of basic rules.

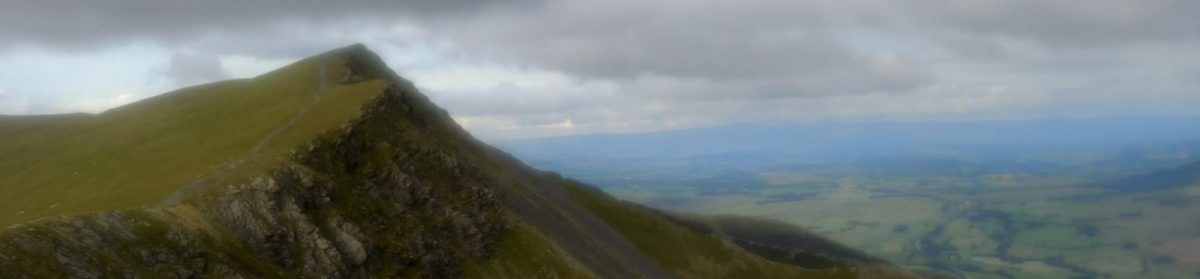
Firstly, choose a suitable location to pitch, try not to go for the most exposed and windiest spot, look for something that might give even just a little shelter from the wind. The lee of a hill, downwind of some trees, near a wall or hedgerow depending on where you are etc. This can help more than you think.
Secondly, learn how to pitch your particular tent properly first, and then figure out how to adapt or modify the pitch according to prevailing conditions. For example, don’t pitch your tunnel tent side on to wind, it will not fare as well as pitching it pointing into the wind. Also, moving your guylines around to give the best resistance to wind will help enourmously.

Having the best tent on the market is not nearly as important as having the knowledge of how best to use and make the most of what you have.

Basically choose the tent that suits you best in terms of space, ease of pitching, weight, headroom etc. and pitch it wisely. Then enjoy using it!

Now what should I take?

So one of the most frequently asked questions is see being posted on several platforms is “I want to go wildcamping, what kit do I need?”.

Well, as with most things there are essential items, and there luxury or desirable items.

First lets look at the essential ones.

Obviously you’re going to need some form of shelter, and that means either a tent, a bivvy, or a tarp. If you’re just getting started then I would heartily recommend a tent, it’s far more friendly in it’s use.

Tents are relatively easy to pitch and will give you plenty of room (depending on the individual tent), far more than a bivvy would, which is essentially a fabric coffin. However, both will give you adequate shelter from the elements, just in slightly different ways. A tarp is just that, a tarpaulin that you can configure to create a shelter, but if you’re starting out then I would not recommend this method unless you’re already familiar with setting up shelters, which if you are then you’re probably already wildcamping and need not read any further.

Next up is your sleep kit. This consists of a mat of some kind and a bag or a duvet to sleep in or under. There’s another post here about this very subject that covers the types of kit available and the pros and cons of each one in more detail. Take a look at that once you’ve finished here.

You’re going to need a bag/rucksack of some kind to carry everything you need. There’s a lot of choice available so one of them will suit your needs.

Tent, sleep kit, and rucksack. These are collectively called the ‘big three’, the three items that will cost you the most, but you’re not really going to go anywhere without them.

Next on the list of essential items is a cook set, something to either cook on or heat water for dehydrated food and hot drinks.

A first aid kit, even a very basic one can be a lifesaver when needed. As can a lifesaver bivvy, a plastic bag that you can crawl into if the shit really hits the fan. A silver foil thermal blanket is also a must.

Another essential is a poo kit, there’s another post here that deals with that one in more detail. Again, have a read of that and come back when you’re ready. Something to carry your water, and at the very least some puritabs to sterilise water from a natural source. Although a decent filter is now part of my essential kit. Again, there’s another post about that here as well.

Whatever food you need for your trip.

Some form of navigation method. Personally I never go without a map and compass, but many just rely on a phone or other device, which is not really a good idea if you think about it. Always have a backup is my philosophy.

Your clothing should be appropriate to the walk and conditions you will be experiencing while out. If it’s raining take a rain jacket, if it’s cold wear layers, if it’s going to be sunny take a hat etc etc. It’s that simple and obvious really.

To sum up your essential kit in list form:

Tent/Bivvy, Sleep kit, Rucksack, First aid kit, Emergency bivvy, Emergency foil blanket, Poo kit, Water carrier, Water purification, Food, Navigation method, Appropriate clothing for the trip.

These are the things I will never go anywhere on a wild camp without, not unless things have gone very wrong indeeed.

Now to the luxury and desirable items, and you can decide which are luxury and which are desirable for yourself.

A powerbank for recharging your phone etc. Spare or extra clothes. Extra treats such as chocolate etc. Pillow. In fact absolutely anything else you like!!

This is a bit of a cop out I know, but to be honest I could spend all day making a list of everything you could take with you if you wanted to. Basically, if you take all of the items in the essential list, in whatever form they come, you won’t go too far wrong. And in time you’ll learn for yourself what extras to take that make life in a tent just that little bit nicer.

Personally, I have a plastic collapsible bottle that was designed to take a whole bottle of wine, so I decant a good red into it and take that too. For me, there’s nothing quite so nice as finding a good pitch with a good view and watching the last of the sun drop beneath the horizon with a mug of red to accompany my evening meal.

I ask you, what could be better than that?

Walking/Trekking Poles

Trekking poles, a silly affectation for the purpose of looking the part, or incredibly useful tools that can help save our knees from the hard abuse of covering a lot of ground while carrying weight?

In truth they are both. But it depends on how and why you use them.If used correctly with the right grip, adjusted to the correct height for the individual using them, and used with the correct gait while walking, then they are indispensable for providing extra stability on rough terrain, and for reducing the stress experienced on the knees and hips. They will also help reduce the amount of energy used walking, because if you get the rhythm right you’ll feel like you’re gliding across the ground.

Trekking poles are an adaptation of the poles used in cross country skiing, where they are used to great effect to help cover huge distances with relative ease. Modified for walking these poles can give the same benefits with a little practice.

However, all to often a lack of understanding on how to use them properly leaves the user with no real appreciable benefit. I’ve seen a lot of people with poles either set far too high or too short, a hard grip on the handle instead of using the loop for hand support, no rhythm in use, or simply with just one pole used like a walking stick and held like a shepherds crook.Look….I’m not trying to be all preachy and holier than thou, if you want to spend your hard earned on a single pole, or a pair of trekking poles, and use them any way you want, then fair play. It’s entirely your choice and it’s not for me tell you that your wrong, or that you shouldn’t.

However, if you do want to get the best from them, then here’s the skinny.First off you either need to get a pair that are the correct length for your height, or adjustable ones that can be set to it. To do this hang your arms by your side then raise your lower arm so that it is 90 degrees to your upper arm. The correct length will be from your hand to the ground. Hold the pole by the handle and loosen the adjustments allowing the pole to extend all the way to the ground, then re-tighten, easy. If your poles have length markers make a note of them for easy setting next time.

Next, your poles will come with handle straps that are integral to stopping fatigue from developing in your hands and wrists. You should put your hand through the strap loop from underneath, then hold the handle with the strap between your thumb and forefinger. The padded section of the strap should be running across the back of your hand. Adjust the strap length so that there is no slack while gripping the handle, but not so tight it’s uncomfortable. It should be a relaxed easy fit so that your hand hangs on the strap at just the right point of the handle for you to hold it comfortably on the contour grip.OK, so that’s the fitting and the setting sorted, now it’s on to how to get the best from them while out on a walk.

As mentioned above, hiking poles are an adaptation from cross country skiing and in fact are used in very much the same way. With your left foot forward and your right hand forward, the pole should be trailing behind slightly so it gives you a very slight push and adds a bit of stability as you step. Once you’ve completed the first step you should then put your right foot forward along with your left hand, again with the pole trailing slightly, and then step forward a second time.Now obviously you have to repeat this process several times, alternating between your left and your right sides for as many times as required in order to complete your walk. Which if truth be told could end up being quite a few times.

Anyway, all joking aside, if you really do want to save your knees for later years and also make your current walks that little bit easier, then getting yourself a pair of hiking poles and figuring out how use them properly will definitely pay dividends in both the short and the long term.

Look after your knees, and look after your hips, because you’ll miss them when they’re gone!!

Mats and Bags

I was asked a question the other day, what mat and bag do you choose for different seasons?

The quick answer is to say get a warmer bag and a better mat for winter. But what if you don’t want multiple bits of kit for different seasons? Let’s face facts, it can become very expensive to buy all the gear multiple times just to accommodate the fluctuating temperatures we experience in the UK, and the extra storage required for something that’s used only for part of the year.

So here’s my take on this perennial issue.

First and foremost you will lose more body heat to the ground than to the atmosphere. This is why everyone will tell you that an appropriate mat is incredibly important. So what mat do you choose?

There are many variations to choose from but any mat will have to meet two main criteria. Firstly, it must insulate you from the ground, even in summer you can lose huge amounts of body heat this way, and for me is the most important aspect. Secondly it must also be comfortable, a decent night’s sleep is incredibly important if you’re staying out, a good night’s sleep makes for a much better day and overall trip.

These are the main types of mat available and their characteristics.

Closed cell foam. This is the perennial favourite used for many many years and was pretty much the only option available for a long time outside of specialist equipment. These are usually very thin and uncomfortable due to the lack of any real support. However, closed cell foam is probably the best insulator out there, and in fact a 5cm thick version is used in polar regions as the go to standard because of that fact. They are very light, but bulky, and therefore usually carried on the outside of your pack. Quite often you’ll see them with a silver layer on one side to reflect any body heat adding to their efficiency. A very inexpensive option.

Inflatable mats. There has been an explosion in the variety available for this type of mat in recent years. From the very cheap, to the incredibly overpriced. Essentially they fall into two categories, insulated and non insulated. The insulated ones will have an r number associated with it, and the higher the number the better the insulation. A spring/autumn rating is around 3 to 5, and a winter rating is around 5 to 8. Non insulated mats are really only any good for summer as the separation between you and the ground is usually enough to keep you warm at that time of year, but definitely not during the colder months. Inflatable mats are usually lightweight at anything between 500 to 950gms and pack down quite small. These are by far and away the most comfortable of all the mats available.

Self inflating mats. These have been around for quite a while, but we’re very much on the expensive side until good inflatable mats became available. They consist of a memory foam core that expands when the valve is opened and air is allowed into it. Once inflated the valve is closed. Usually you can give them a little extra air with one or two breaths just for that extra little bit of comfort. However, despite providing reasonable comfort they are still not the most comfortable of options as they are usually still quite thin, around 5cm is considered thick. The big upside is that they provide excellent insulation being a much thicker foam than the closed cell variety. The drawback is that they are very heavy and very bulky.

On to bags.

There are two main types, synthetic and down.

Down are lighter, pack smaller, and give greater insulation weight for weight. The downsides (no pun intended) are that you have to be very careful when choosing a down bag, as quality and fill vary enormously. Not all down bags are created equal, plus they are usually more expensive than synthetic bags. Also, the moment down gets even damp it loses it’s insulating qualities, which as you can imagine could be catastrophic. However, most decent bags will use a hydrophobic coating.

Synthetic bags don’t lose their insulation when damp, but they are usually heavier and bulkier than down. Also, they tend to be far less expensive than down for the equivalent rating.

The important thing to bear in mind with bags are the two ratings given. One is the comfort rating, the other is the extreme rating. I think it’s fairly self explanatory but here’s the kicker. Sleeping bag manufacturers lie!!! They all do, even the reputable ones. As a general rule of thumb take off at least 5c from it’s rating, so if the bag states that it has a comfort rating of -2 it probably means that by the time it gets to freezing point you’ll already be feeling the cold. My bag has a comfort rating of -10c but I wouldn’t trust it below -5, and it comes from a good and reputable brand.

A sleeping bag liner can add a good 5c of warmth if you want that bit extra without forking out for another bag, as can layering your clothing for sleep. In fact there’s a lot you can do to stay warm with whatever kit you have, but that’s a subject for another post.

To go back to the original question, what do I choose to use for different seasons? The answer is simple, for me I use the same in all seasons, I just adapt or use my kit differently according to conditions. For example, in summer I open up my bag and use it as a quilt to stop over heating, whilst not sleeping in very much at all. In winter it’s fully closed, I’m wearing thermals and a hat (and maybe even a fleece), and possibly using a bag liner as well. These days I use the same r5.8 inflatable mat all year round and bolster that with a thin closed cell foam mat with a reflective face if needed. For me it’s all about adapting my kit, not buying more.

But if you want a complete selection of kit to choose from then that’s fine too, because let’s face it, it’s all about choice and personal preference.